
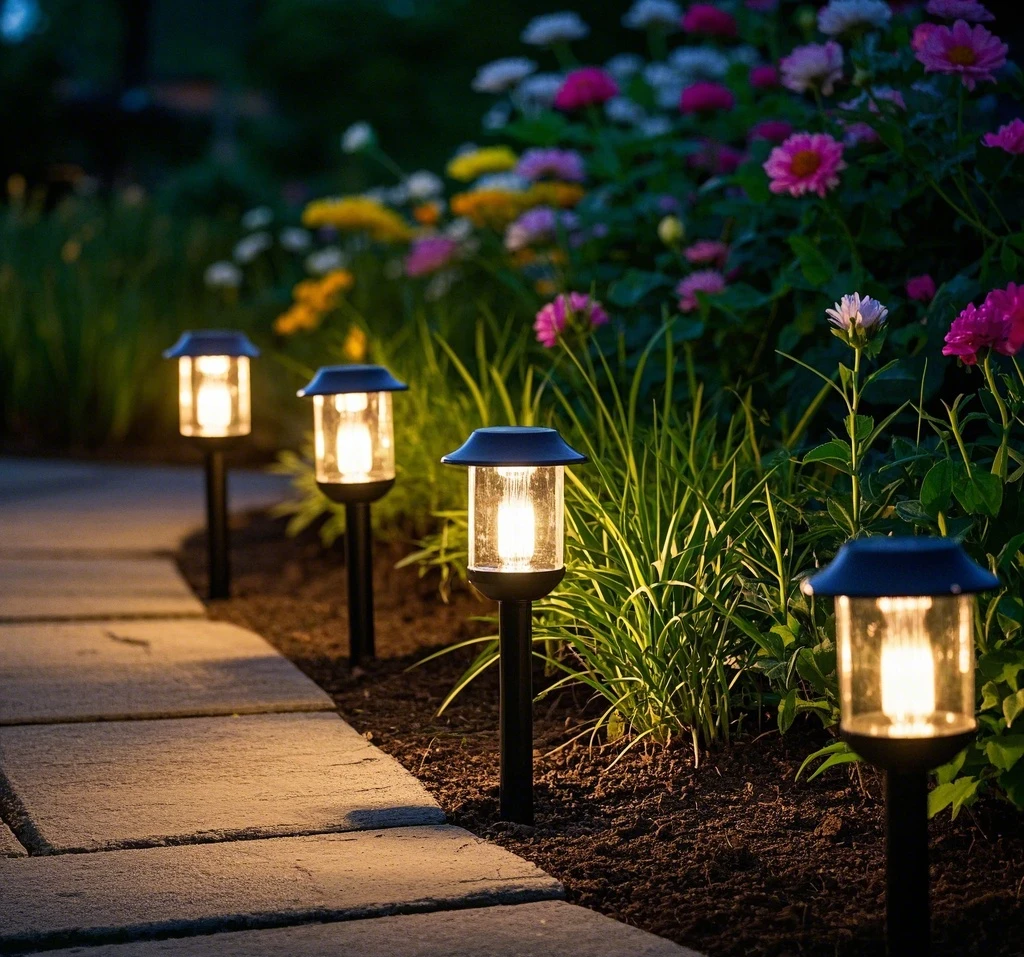
Solar lights are an eco-friendly and cost-effective way to brighten your garden, patio, or driveway. By harnessing sunlight through photovoltaic cells, these lights store energy in batteries during the day to illuminate your outdoor spaces at night. However, like any outdoor equipment, solar lights require regular maintenance to perform at their best. Over time, dirt, dust, and debris can accumulate on their surfaces, reducing their efficiency and dimming their glow. In this 2500-word guide, we’ll provide you with a detailed, step-by-step process for cleaning solar lights, innovative tips to enhance their performance, and insights into how your efforts contribute to a greener planet. Whether you’re a seasoned solar light user or a newcomer, this article will equip you with everything you need to keep your lights shining bright.
Why Cleaning Solar Lights is Essential
You might wonder: why bother cleaning solar lights? The answer lies in their core component—the solar panel. A dirty solar panel can reduce a light’s efficiency by as much as 30%, according to solar energy studies. Dust, pollen, bird droppings, or leaves can block sunlight from reaching the photovoltaic cells, meaning less energy is captured and stored. This translates to dimmer lights, shorter run times, and even a reduced lifespan for the battery and LED components.
Imagine your solar light as a plant: just as leaves need sunlight to thrive, solar panels need clear exposure to charge effectively. Neglecting this simple maintenance task is like leaving your lights under a perpetual cloud. Beyond performance, clean solar lights also enhance the aesthetic appeal of your outdoor space—no one wants a grimy fixture detracting from their garden’s charm. In this guide, we’ll show you how to restore your lights to peak condition and keep them that way.
Materials Needed
Before diving into the cleaning process, gather these basic materials:
- Soft cloth or sponge: Prevents scratches on delicate surfaces.
- Mild soap: Dish soap works well; avoid harsh detergents.
- Water: For mixing solutions and rinsing.
- Soft brush: A toothbrush is ideal for small crevices.
- Optional: White vinegar: Perfect for tackling stubborn stains.
For an eco-friendly twist, try this DIY cleaning solution:
- 1 cup water
- ¼ cup white vinegar
- A few drops of mild dish soap
Mix these in a spray bottle, shake well, and you’ve got a natural cleaner that’s tough on grime but gentle on your solar lights. Why avoid abrasive tools or chemicals? Scratches or corrosion from harsh substances can damage the solar panel’s protective coating, reducing its ability to absorb sunlight over time.
Step-by-Step Cleaning Guide
Cleaning solar lights is straightforward, but doing it right ensures longevity and efficiency. Follow these steps for a thorough clean:
1. Preparation
Turn off the light: If your solar light has an on/off switch, flip it off to avoid any electrical mishaps.
Remove if possible: Detach the solar panel or light fixture from its stake or mount for easier access. Be gentle to avoid damaging wires or connections.
2. Initial Cleaning
Brush off loose debris: Use a soft brush or dry cloth to remove dust, leaves, or spider webs. For sticky spots like bird droppings, dampen the cloth slightly to soften them first.
Be gentle: Think of this step as dusting a delicate keepsake—too much force could scratch the surface.
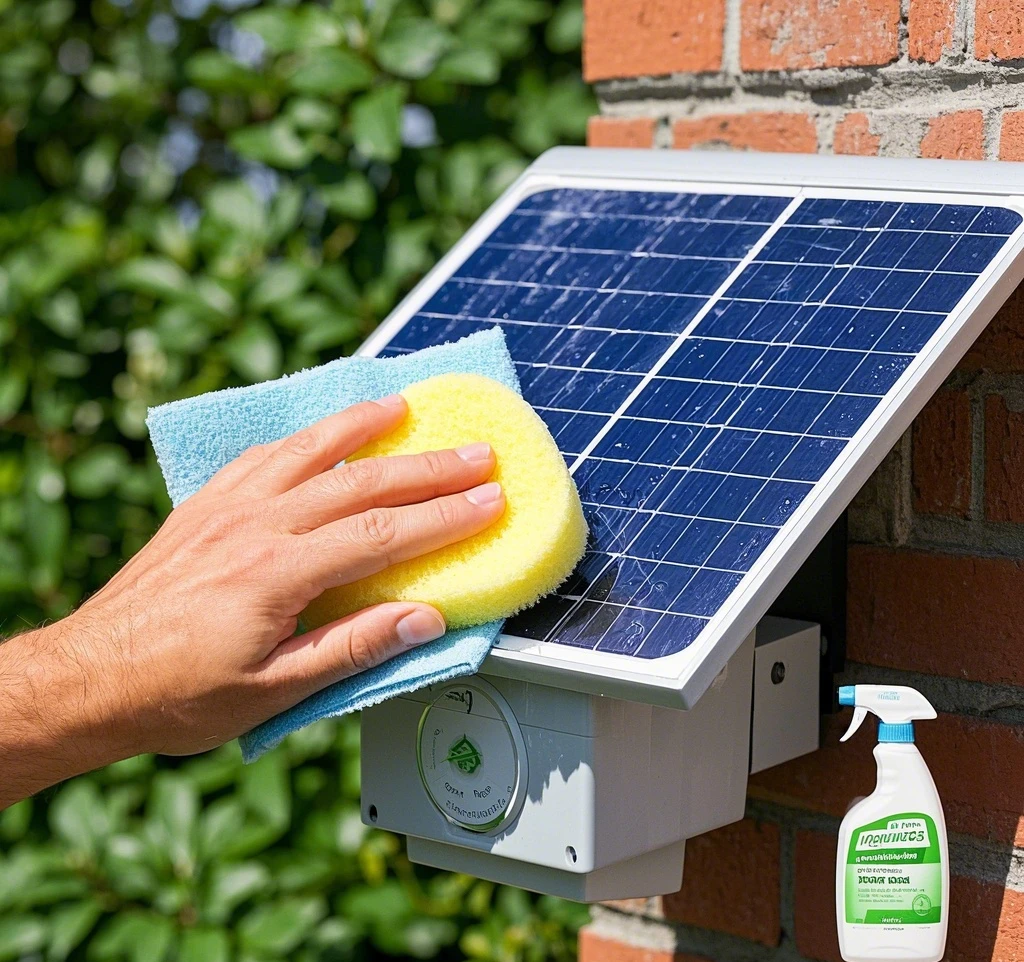
3. Washing
Prepare the solution: Mix a small amount of mild soap with water—or use your DIY vinegar blend.
Wipe down surfaces: Dip your soft cloth or sponge into the solution and gently scrub the solar panel and light fixture. Picture giving your light a spa treatment: circular motions work best to lift dirt without pressing too hard.
Focus on the panel: Ensure no soap residue remains, as it could cloud the surface and block sunlight.
4. Rinsing and Drying
Rinse thoroughly: Use a clean, damp cloth to wipe away any soap or vinegar residue.
Dry completely: Use a soft, dry cloth to remove all moisture. This step is crucial—leaving water behind could lead to spots or, worse, internal damage if it seeps into the battery compartment.
5. Dealing with Stubborn Stains
Vinegar solution: For tough grime, apply a 1:1 mix of vinegar and water with a cloth. Let it sit for a minute before wiping clean.
Alternative cleaners: If vinegar isn’t enough, look for commercial cleaners labeled safe for solar panels—but always test on a small area first.
6. Reassembly
Put it back together: Reattach any removed parts, ensuring everything is secure and aligned.
Test it: Place the light in a sunny spot and check its performance that night.
Additional Tips for Maintenance

To keep your solar lights in top shape between deep cleans, consider these pro tips:
- Cleaning frequency: Aim for every 2-3 months, or more often in dusty or pollen-heavy areas.
- Check for pests: Insects love solar lights—remove nests or webs gently with a brush.
- Battery inspection: Open the battery compartment (if accessible) to look for corrosion or leaks. Clean with a cotton swab dipped in vinegar if needed, then dry thoroughly.
- Post-rain wipe: After heavy rain, give the panel a quick swipe to prevent water spots or mineral buildup.
Troubleshooting Common Issues
Even with regular cleaning, solar lights can encounter problems. Here’s how to address them:
- Dim light: If cleaning doesn’t help, the battery might be old. Charge the light in direct sunlight for a full day; if it’s still dim, replace the battery (typically AA or AAA rechargeables).
- Inconsistent performance: Dirt on the sensor could be the culprit. Wipe it clean and ensure it’s not obstructed by plants or shadows.
- No light at all: Verify the panel gets full sun exposure—trees or buildings might have grown to block it. If that’s not the issue, the LED or wiring may need professional attention.
For a quick test, try this: clean your light, charge it all day, and note the brightness at night. Compare it to a pre-cleaning observation to see the difference firsthand.
Seasonal Maintenance
Your cleaning routine might vary with the seasons—here’s how to adapt:
- Spring/Summer: Pollen and dust are the main foes. A light wash every month keeps panels clear.
- Fall: Fallen leaves can pile up fast. Check weekly and clear debris promptly.
- Winter: In snowy regions, snow or ice can cover panels. Brush it off gently or, if temperatures plummet, store lights indoors to avoid freeze damage. For lights left outside, angle them to shed snow naturally.
Environmental Benefits of Clean Solar Lights
Maintaining your solar lights isn’t just about performance—it’s a small but meaningful step toward sustainability. According to the National Renewable Energy Laboratory, solar lighting can cut carbon emissions by up to 80% compared to grid-powered alternatives. A clean solar light maximizes this benefit by ensuring efficient energy use, reducing your reliance on fossil fuels.
Think of it this way: each sparkling solar light is a tiny victory for the planet, lowering your carbon footprint and waste from premature replacements. Plus, the cost savings from fewer battery swaps add up over time, making this a win for both your wallet and the environment.
Common Mistakes to Avoid
Avoid these pitfalls to protect your solar lights:
- Abrasive tools: Sponges or steel wool can scratch the panel, impairing its function.
- Excessive force: Pressing too hard risks cracking the panel or fixture.
- Harsh chemicals: Bleach or ammonia can corrode materials—stick to mild solutions.
- Skipping drying: Moisture left behind can damage internals, especially in humid climates.
DIY Cleaning Solution Recipe
For a green alternative to store-bought cleaners, try this:
- Ingredients: 1 cup water, ¼ cup white vinegar, a few drops of dish soap.
- Instructions: Mix in a spray bottle, shake well, and apply sparingly. Wipe with a soft cloth and rinse clean.
This solution cuts through grime without harming the light’s components or the environment—a perfect match for solar technology’s eco ethos.
Cleaning Solar Lights in Different Settings
Solar lights come in various forms—here’s how to adapt your cleaning:
- Wall-mounted lights: Use a stable ladder and remove if possible for a thorough scrub.
- Stake lights: Pull them from the ground carefully to avoid bending the stake.
- Water feature lights: Disconnect electrical parts first and dry completely before reconnecting.
FAQs
How often should I clean my solar lights?
Every 2-3 months is ideal, but increase frequency in dusty or pollen-prone areas.
Can I use a pressure washer?
No—high pressure can damage delicate components. Stick to gentle hand-cleaning.
What if my light stops working after cleaning?
Check battery connections, ensure full sun exposure, and replace the battery if needed. If it persists, contact the manufacturer.
Can I clean the battery compartment?
Yes, but only if it’s accessible. Use a dry cloth or a swab with vinegar for corrosion, then dry thoroughly.
Cleaning your solar lights is a simple yet powerful way to ensure they shine brightly for years to come. With just a soft cloth, some mild soap, and a few minutes, you can boost their efficiency, extend their lifespan, and enhance your outdoor space. This guide has armed you with a detailed cleaning process, troubleshooting tips, and innovative ideas like seasonal care and eco-friendly solutions. By maintaining your solar lights, you’re not only saving money and effort but also contributing to a cleaner, greener world. So, grab your supplies, step outside, and give your solar lights the care they deserve—your garden (and the planet) will thank you!
Leave a Reply